DIY LIMB RISERS - Build Your Own Under $75
This DIY can be applied to nearly any vehicle– from a Subaru Car to a Toyota SUV, Truck & beyond.
This DIY is for vehicles that don’t have a full-width bash bar to mount the Limb Risers to.
However, portions are still applicable to mounting to a front bash bar.
You would need to swap the hinge for an oval clamp large enough to wrap around the bar.
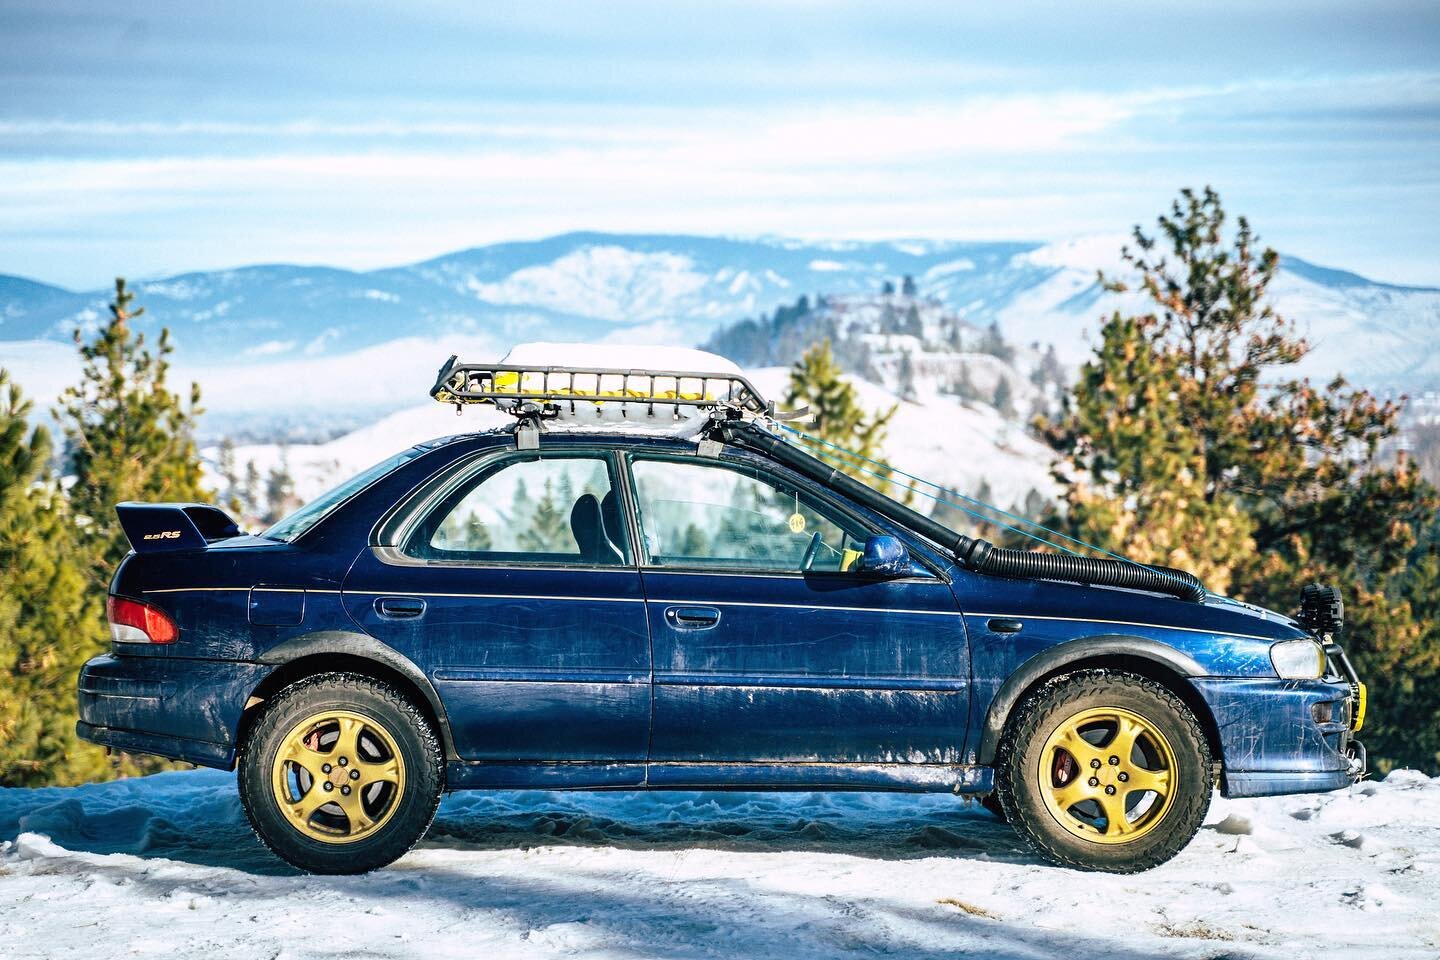
Limb Risers are a neat addition for any vehicle that finds itself off-road, especially in wooded areas. Chances are, if you’re on this article you already know what limb rises are, but for those that randomly stumbled here:
What are Limb Risers?
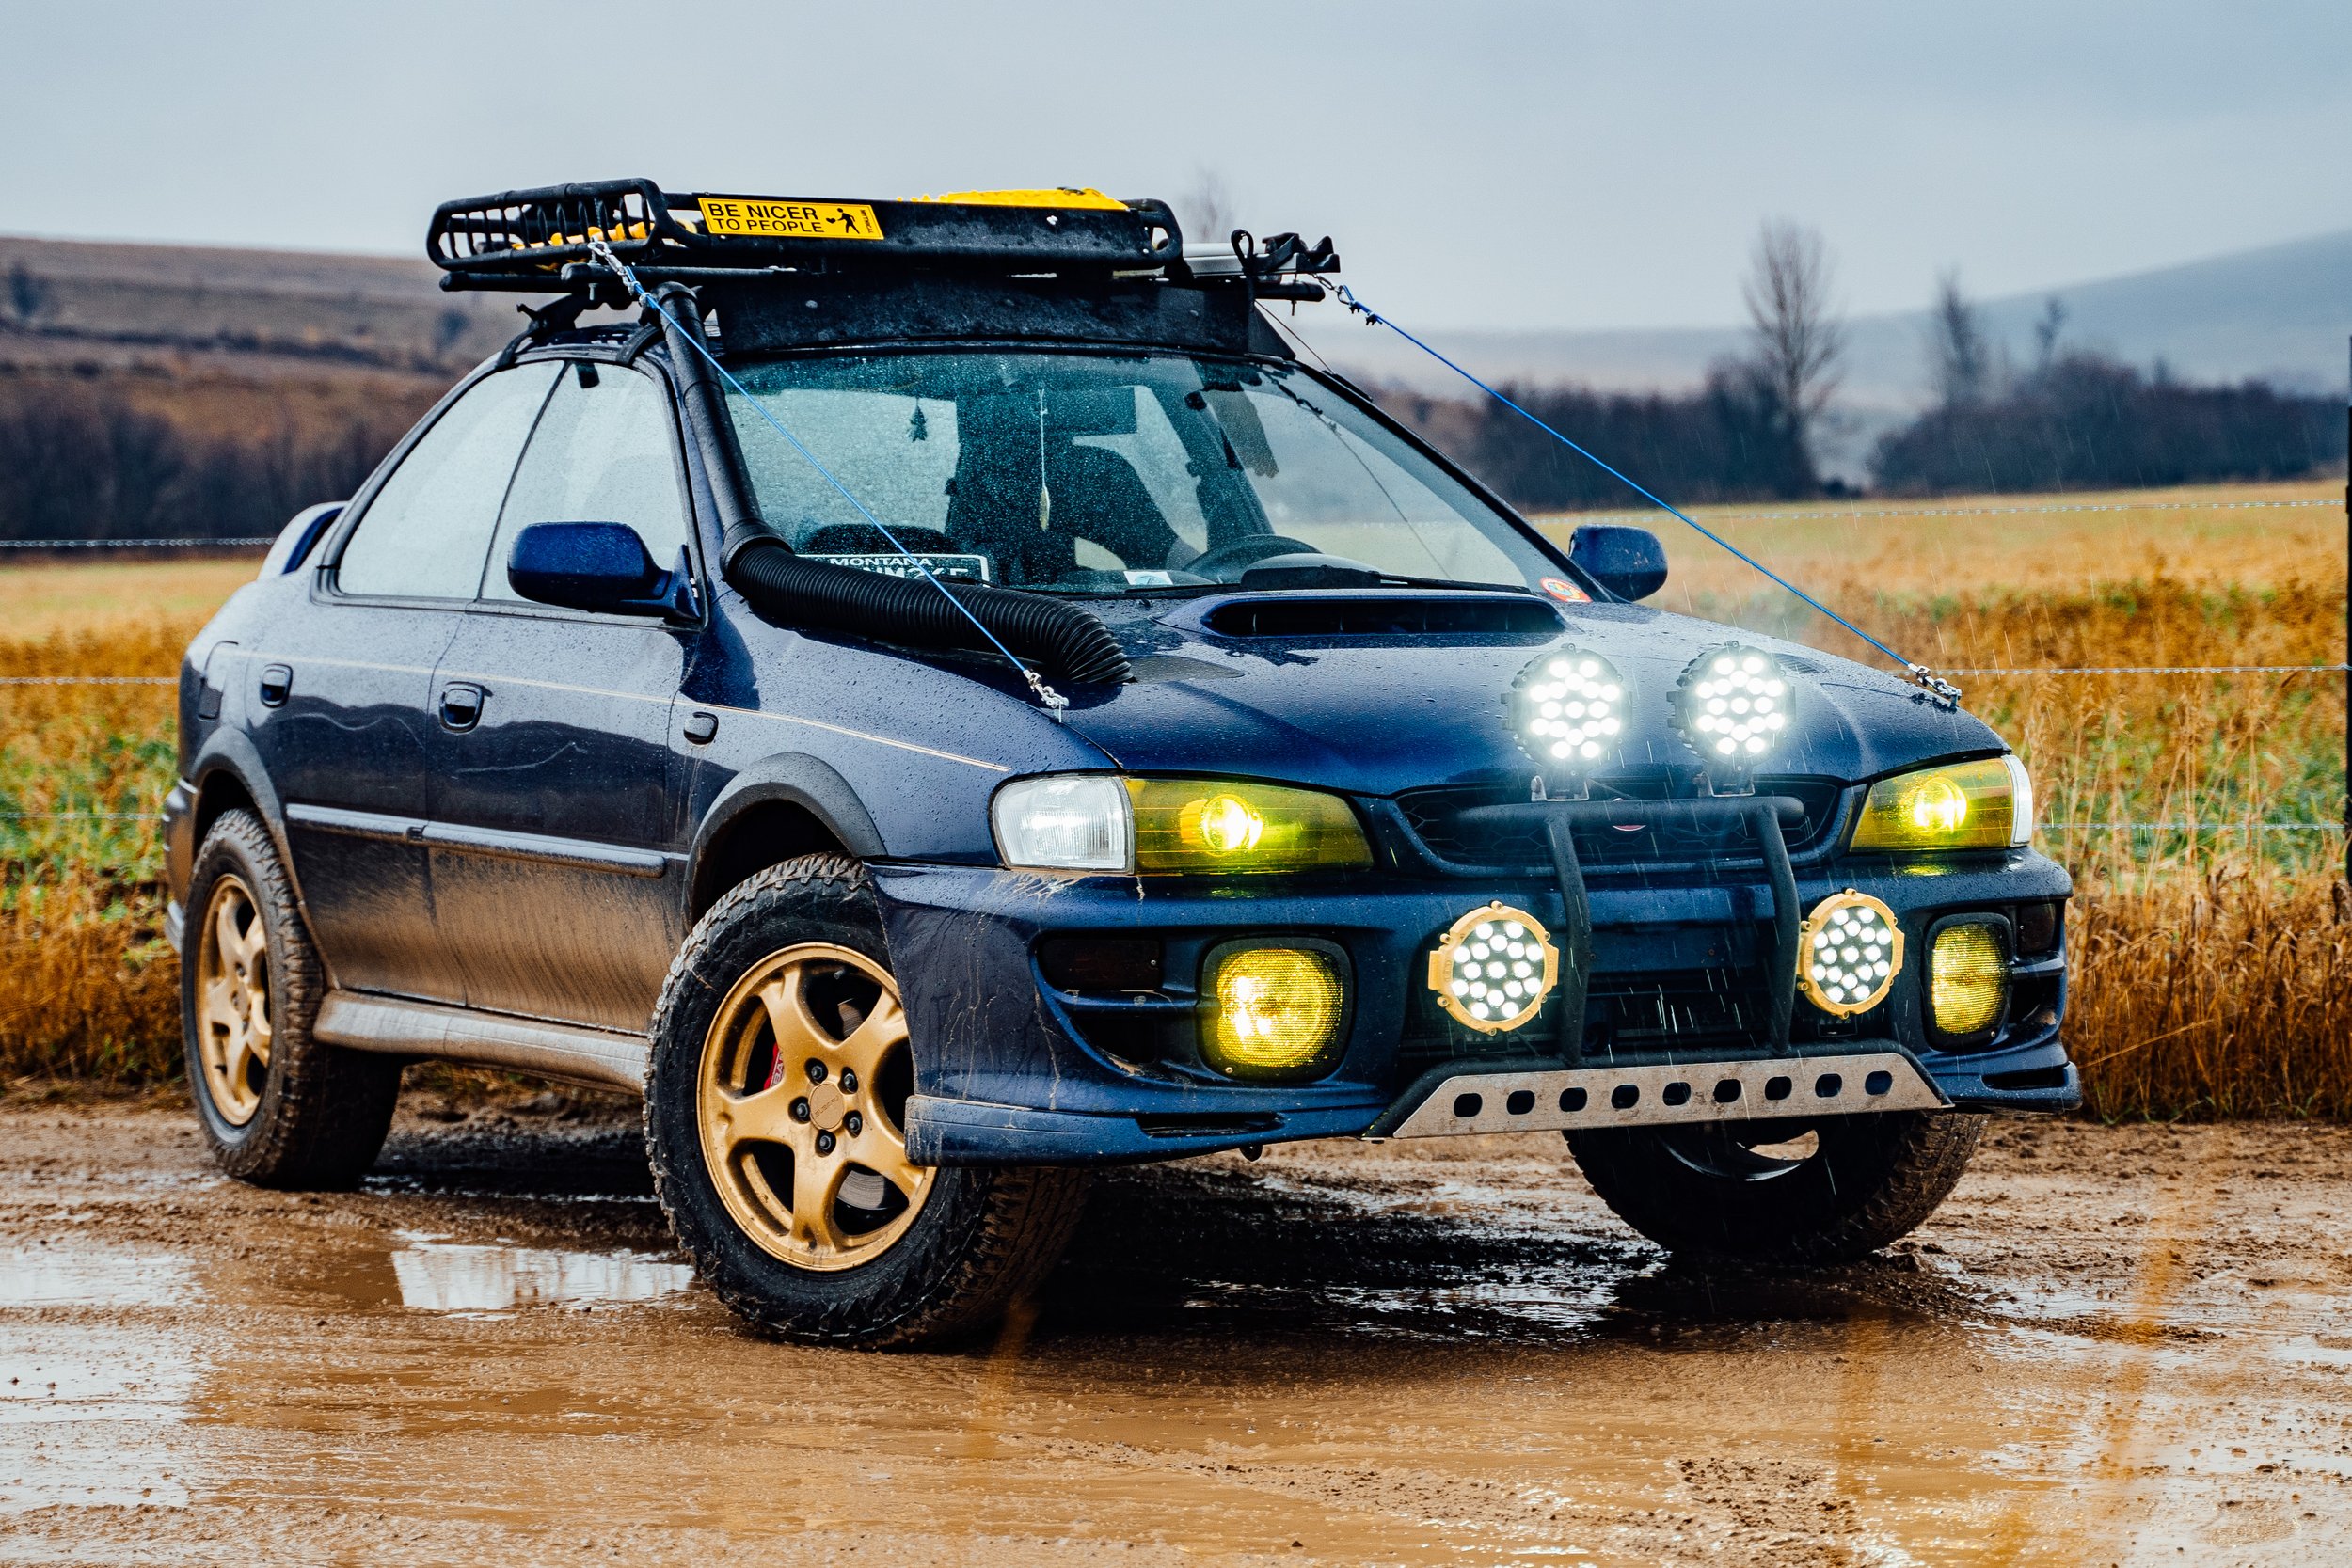
Limb Risers are wires that connect somewhere towards the front of a vehicle to somewhere up high on the roof. These wires do precisely what the name states– they lift tree limbs up and over the vehicle’s hood to reduce scratches to the paint & windshield, as well as help to increase visibility when the tree branches are moving along your rig.
Why Build Your Own DIY Limb Risers?
There are a few reasons that you may want to go the garage-built method:
1.) It can save you money.
2.) They don’t make off-the-shelf solutions for your vehicle.
3.) You prefer to make as many custom parts as possible.
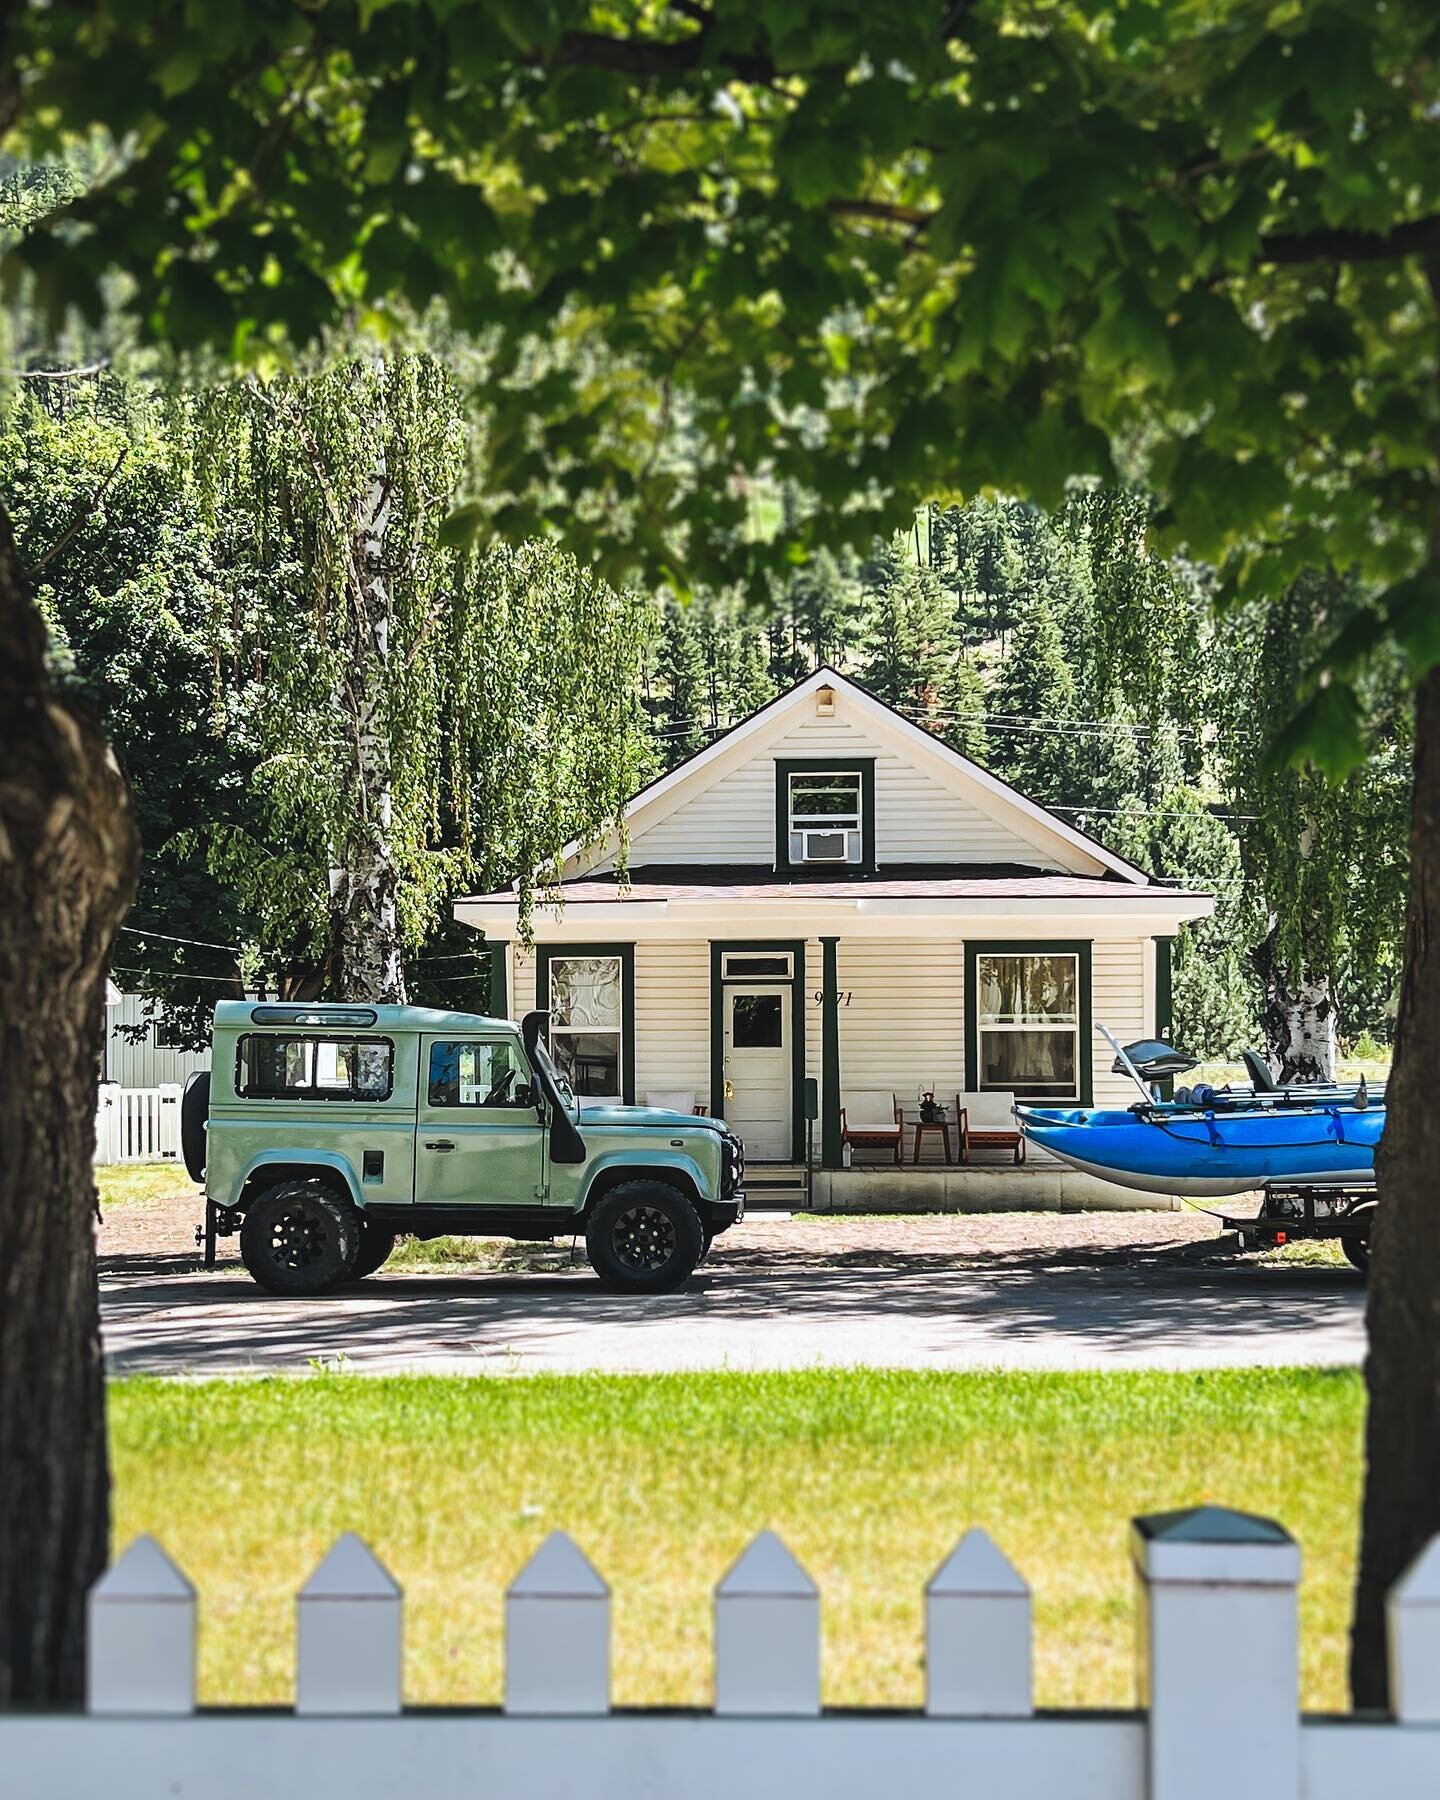
For me, it was a combination of all three of those reasons. Even if a pre-made set was available, technically you can buy universal kits, I preferred to give it a shot myself. It’s a cheap and entertaining way of spending a night in the garage getting creative. Plus, if you take a look at my 2000 Subaru Impreza 2.5rs Off-Road Build, it’s covered in home brewed solutions due to either the parts I want don’t exist for my chassis, they are crazy expensive, or I wanted a different style than what the aftermarket offers.
DIY LIMB RISERS PARTS LIST
A Trip To Ace Hardware & $74.66 Later

• (2) Eye Bolt - 1/4” x 4” - (size may depend on application, such as thickness of your mounting point)
• (4) Nut That Fits Eye Bolt
• (4) Washer That Fits Eye Bolt
• (2) Shackle with Screw Pin - 3/16” - (optional, I used them originally, but have since removed them. Size can depend on the size of the hinge you choose)
• (2) Wire Rope Thimble - 1/8” - (size will depend on the size wire you choose)
• (2) T’Buckle - 3/16” x 4”
• (2) Spring Snap (aka careener) - 5/16” - (other sizes would work as well)
• (2) T Hinge - 2” - (size may depend on your chassis’ mounting area & how high you want the hinge to extend above your hood)
• (4) Wire Rope Clip - 1/8” - (size depends on your thickness of wire)
• (1) Drill Bit - 1/4” - (size will depend on the thickness of the chosen eye bolt)
• (2) Dog Tie Out with Clips - 10’ - 1/8” thickness - (you can get longer or shorter, depending on your application, one 20’ leash would’ve also worked for me)
• Something to cut through the dog leash - not pictured - (either a heavy duty cutter or a saw - I used a hand saw)
Below Photos Are Listed In The Order Above For Ease Of Reference


How To Install The DIY Limb Risers

Install the Hinge
Find a place to mount the hinge to, as far to the front of your vehicle as possible.
Drill holes & secure with the supplied screws.
You could use bolts, too, if desired.

Drill the Top Hole to Fit the Shackle or Clip
The hole in my chosen hinge was smaller than both the shackle & the clip that is attached to the dog leash.

Test Fit the Shackle
If you choose to use the shackle, this is the time to test fit to make sure it fits– which it should if you have the right size hole.

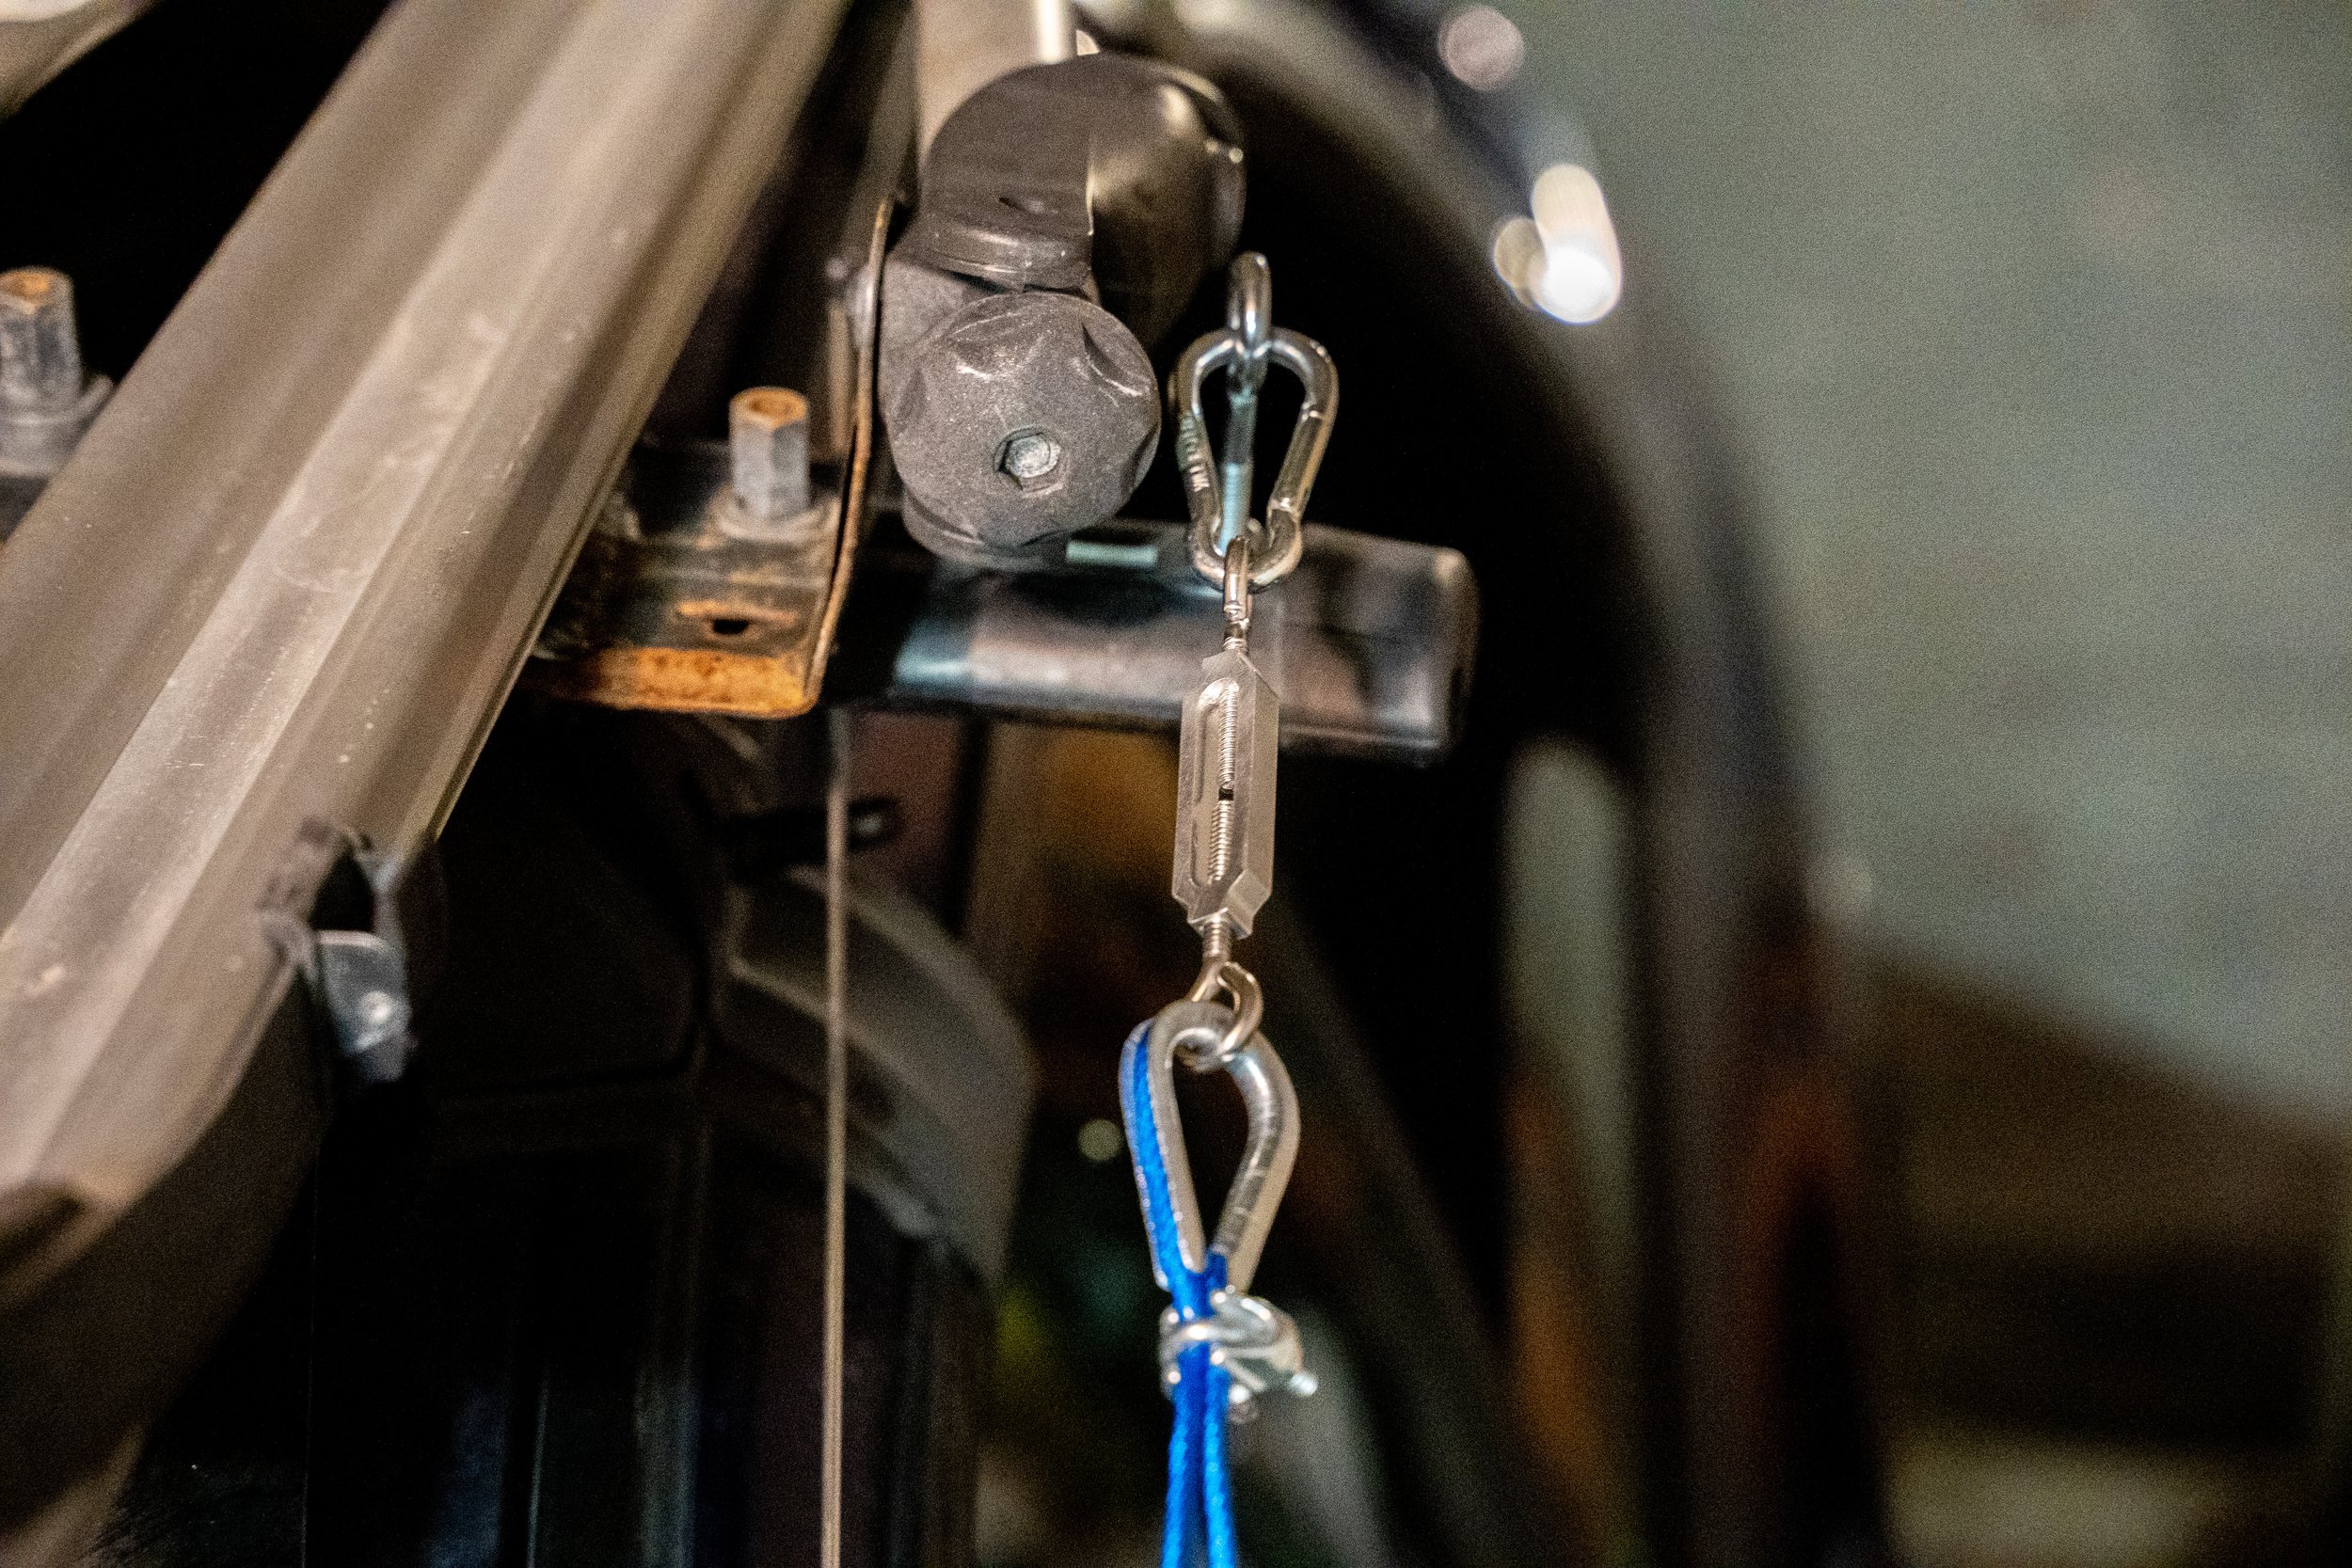
Drill & Install the Eye Bolt
Drill a hole all the way through your mounting point. For me, it was the crossbar of the roof rack.
You may choose the same or mounting directly to a basket or something of the sort.
Make sure to install a nut & washer on both side of the mounting point. This allows you to adjust the height of the bolt and tighten it down properly.

Install the Spring Snap & T’Buckle
Clip on the careener & the t’buckle.
Make sure the t’buckle bolts are backed out pretty much all the way. You’ll need to be able to screw them in to adjust the tension of the wire.

Attach the Dog Tie Out
Clip the leash to either the shackle or directly to the hinge.
Note: I have to remove the shackle in order to lift / close the hood– which requires loosening & unclipping the leash. I can complete this entire process in about a minute.
Cut the Wire & Install the Thimble
Measure out the leash - you want to have extra.
Put the Wire Rope Thimble through the T’Buckle.
Wrap the leash around the thimble.
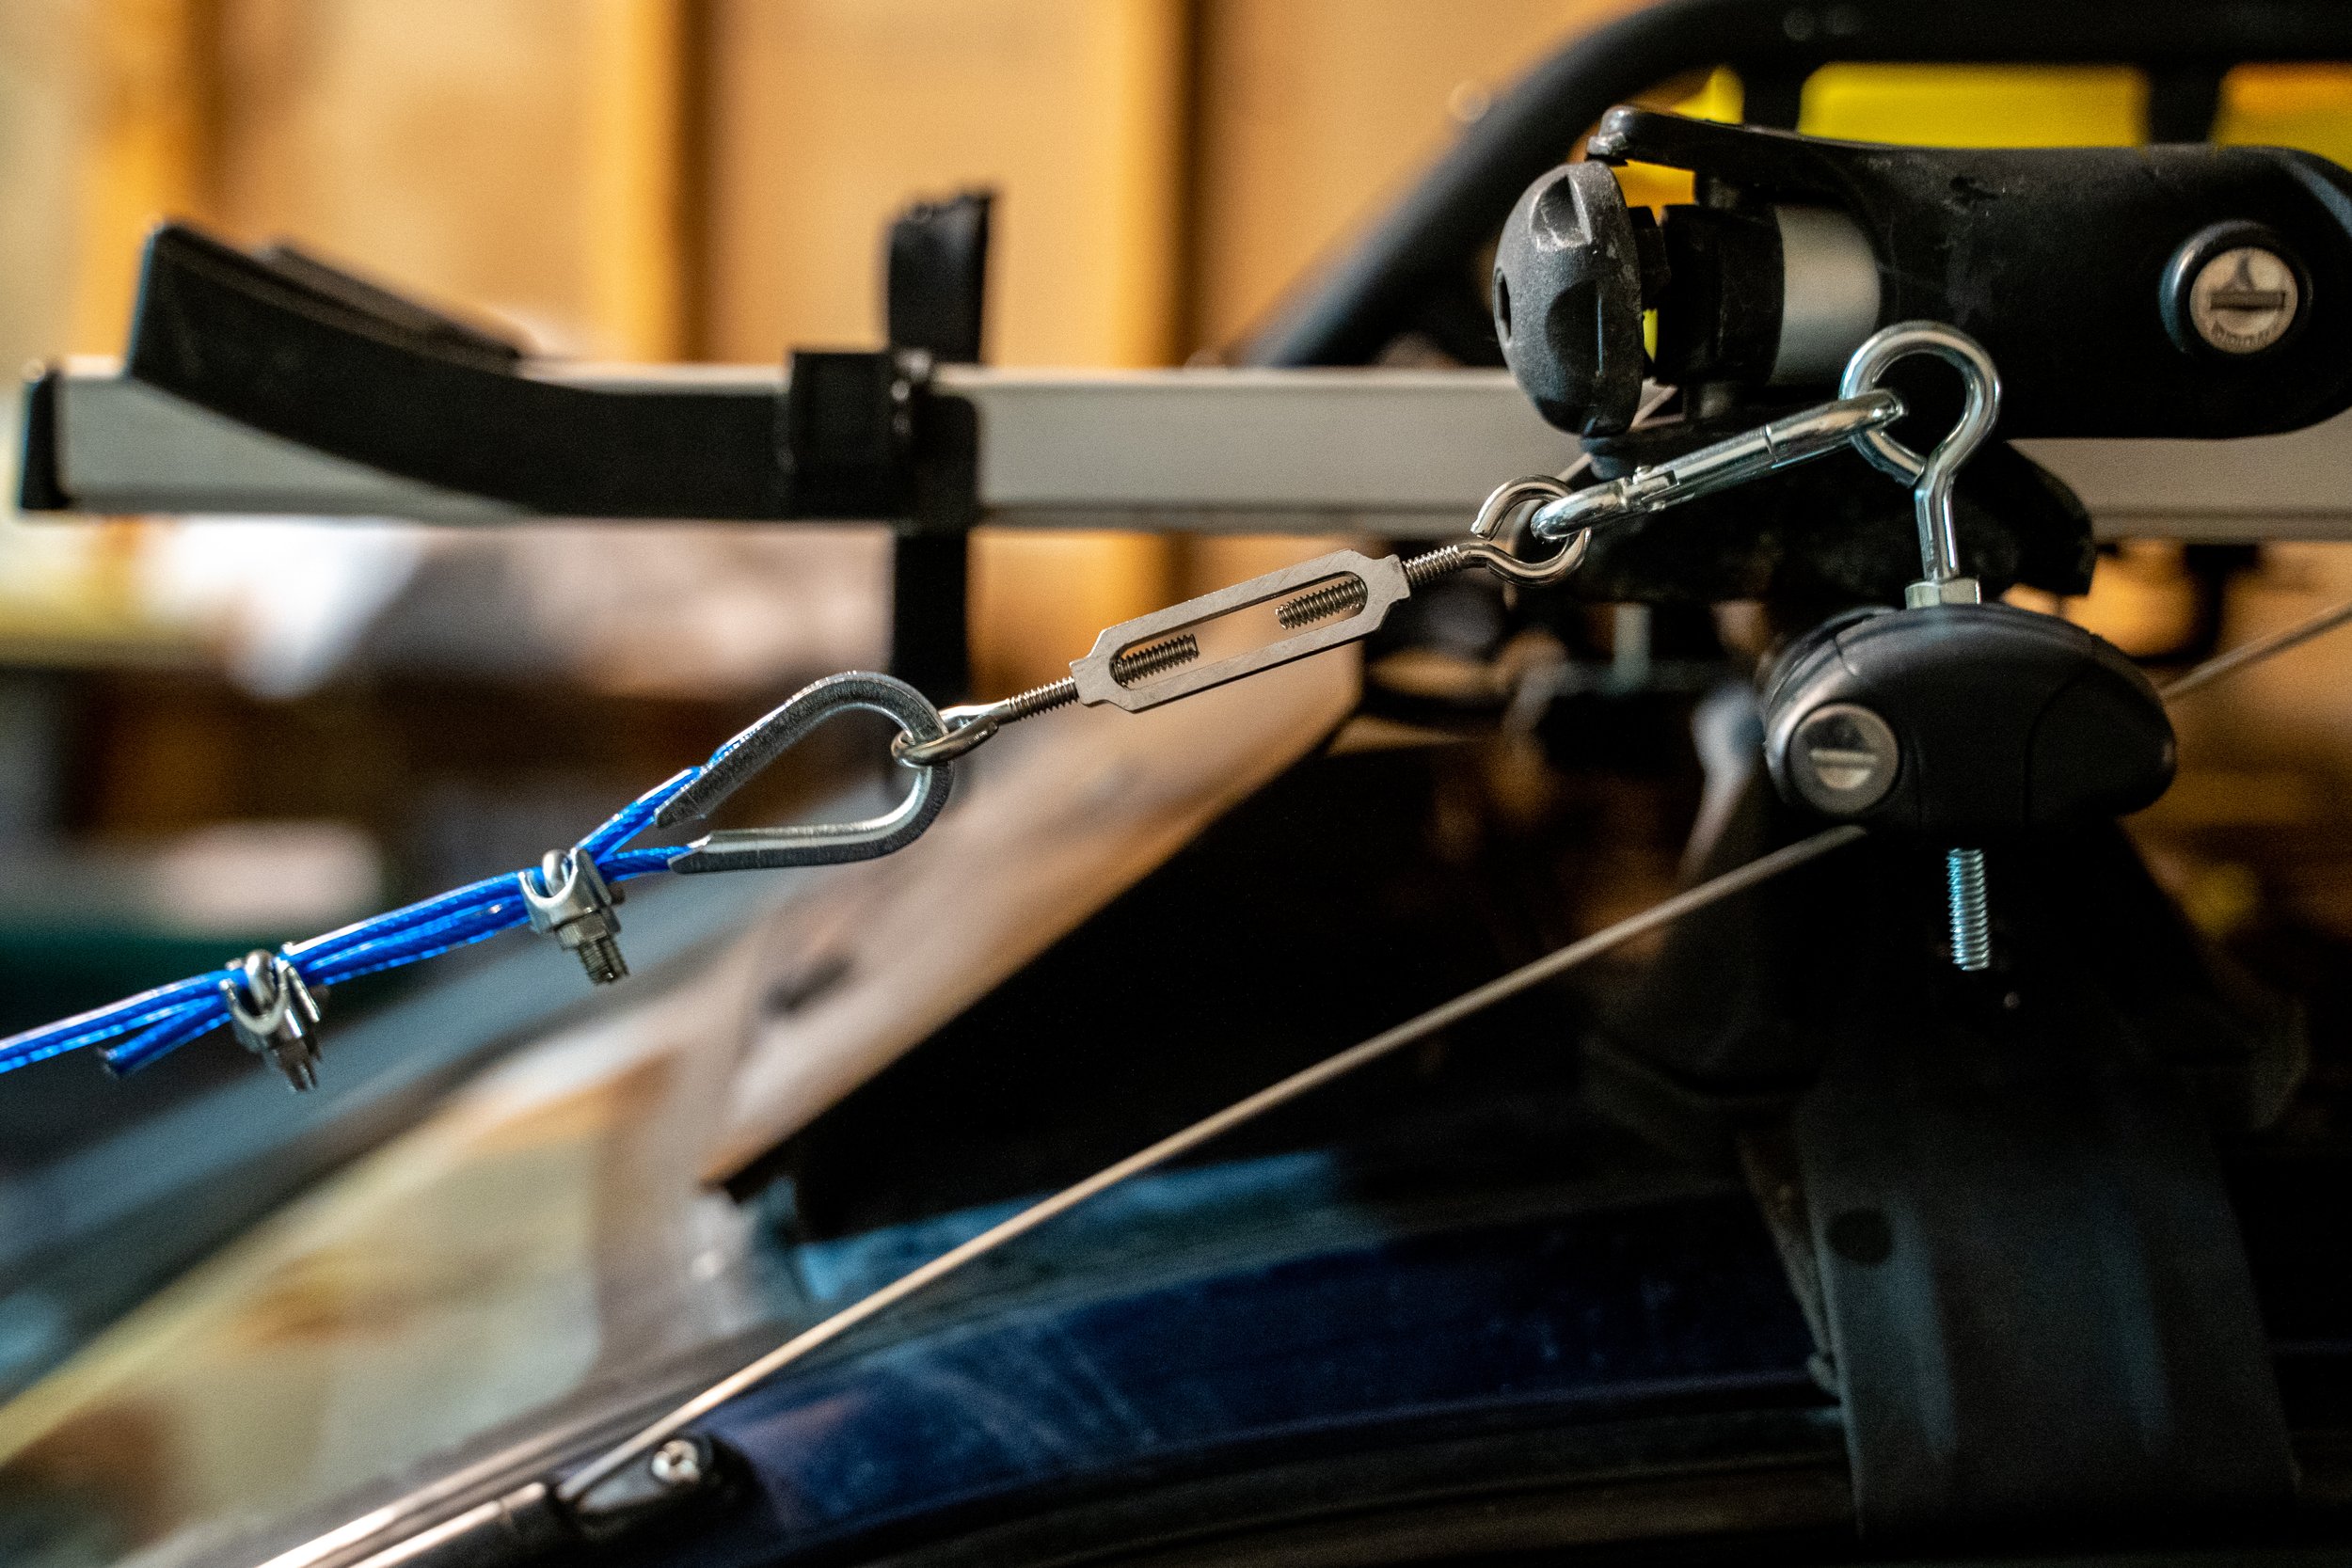
Clamp It Down
Install the Wire Rope Clips & tighten down all the way
Make sure the rope is as tight as you can get it before tightening down the clips.
FINALLY - Turn the T’Buckle until the rope it very, very tight. There shouldn’t be any slack & it shouldn’t move much when you put pressure on it.

Final Adjustments
Naturally, the wire will stretch from tension & will gradually loosen up. Occasionally, check the wire’s tension & tighten the T’Buckle as needed.
If the T’Buckle doesn’t allow for enough adjustment, loosen it up all the way– loosen up the wire clips & pull on the wire until it’s under full manual tension. Tighten the clips again & dial in final tension using the T’Buckle.
FINAL THOUGHTS
It’s as simple as that! I was able to install this DIY Limb Riser setup on my 2000 Subaru Impreza 2.5RS Off-Road Build in around an hour’s worth of time. I think I spent more time at Ace Hardware trying to envision the setup in my head and find the necessary parts. The install process and specs of some of the equipment will vary depending on the chassis; however, this layout should prove to be functional for most vehicles with some tweaks made here and there.
Either way, the main goal was to share with others one of the many ways that I’m sure one could go about building their own limb risers. Being that this Subaru is my main project at the moment and no one really makes parts like this for my generation of Impreza, I find myself in the garage tinkering with ideas more often than I find myself ordering parts online to simply bolt-on. I wouldn’t have it any other way, though!
If you decide to take inspiration from this write-up and create your own Limb Risers, I’d love to see the finished product! Hit me up on Instagram with some photos or if you have any questions!
My Main Account: @wanderlustnotless


Off-Road Subaru Impreza Account: @2.5rallysport